Step 1:
Start by visiting the landing
page of the
RFSOATS
then navigate to the services below and choose
create request

Step 2:
On the client request page CHOOSE REQUEST TYPE by setting:
- document classification
- request type

Step 3:
If the client haven't applied in the system
they must proceed to the client information.

but if they already applied before, client can now continue to
use the access code

Step 4.b:
Forgot the access code?
Click the link "Haven't received an email yet?"
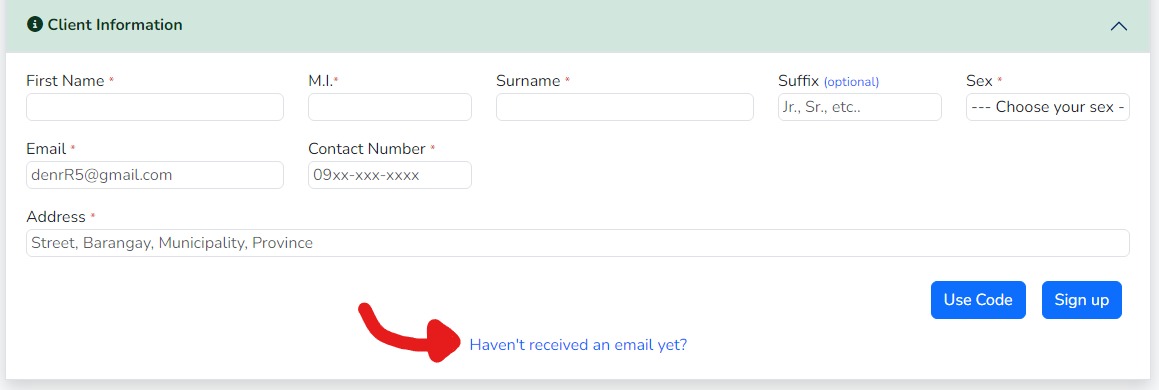
or continue to use the access code if you already have it
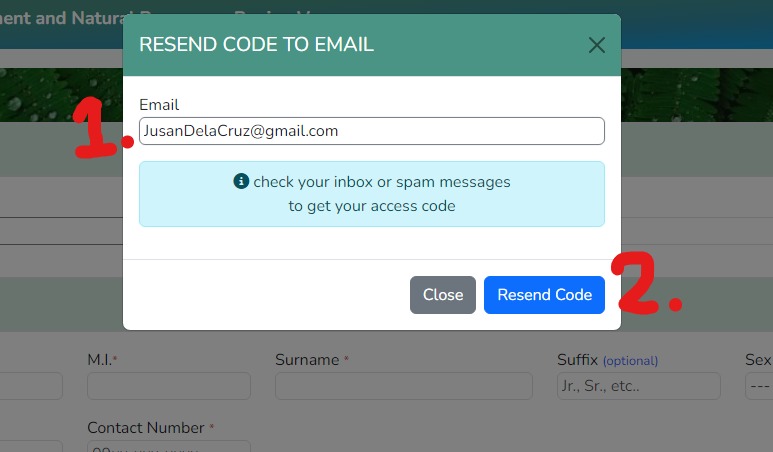
Step 4.c
Resend to email
Click the link "Haven't received an email yet?"
enter the email and click "Resend code"
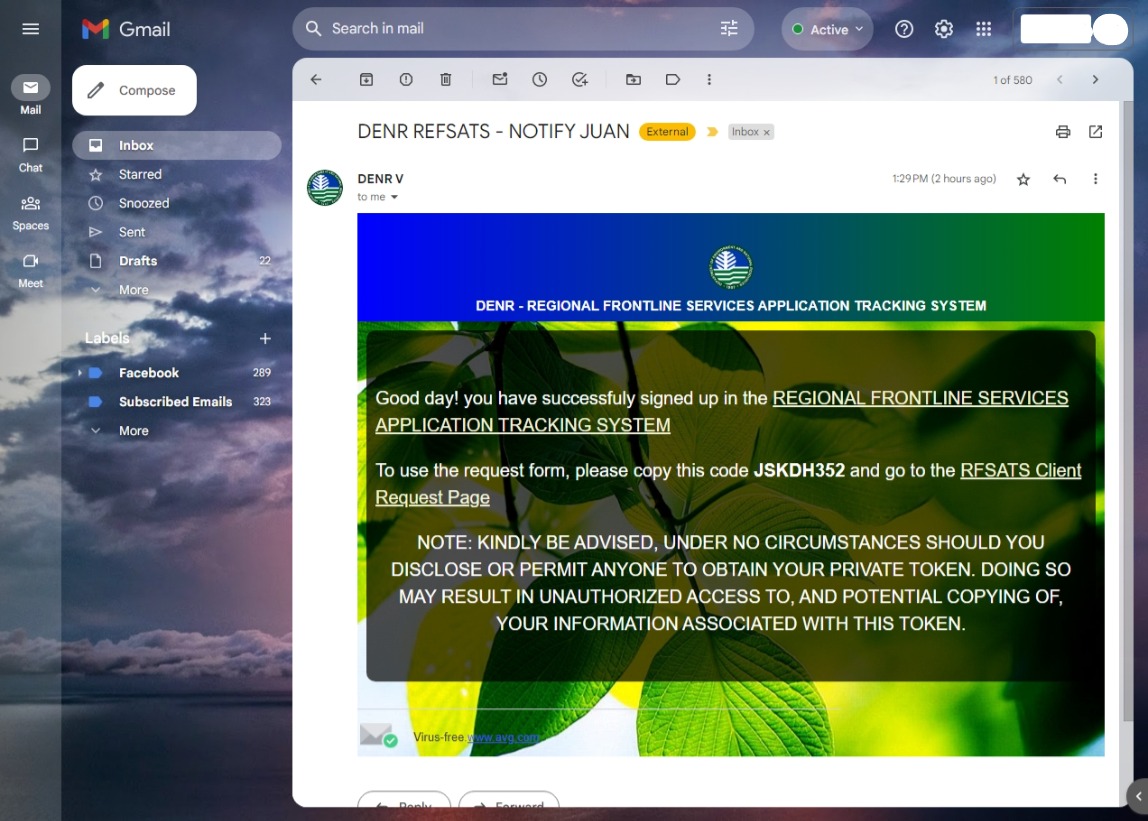
Step 5:
check your email box or spam to get access code
Step 4.a:
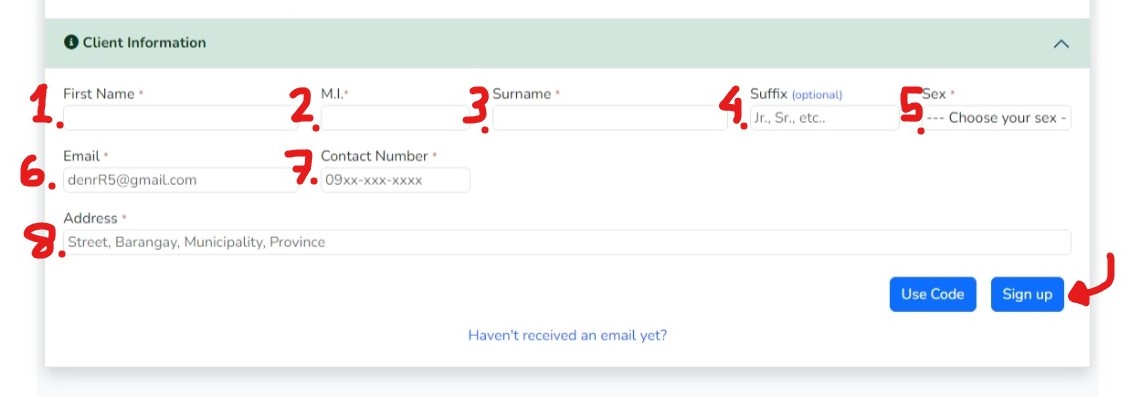
Input client information
- First Name
- Middle Initial (MI)
- SurName
- Suffix
- Sex
- Contact Number
- Address
then click "Sign up"
Step 6:
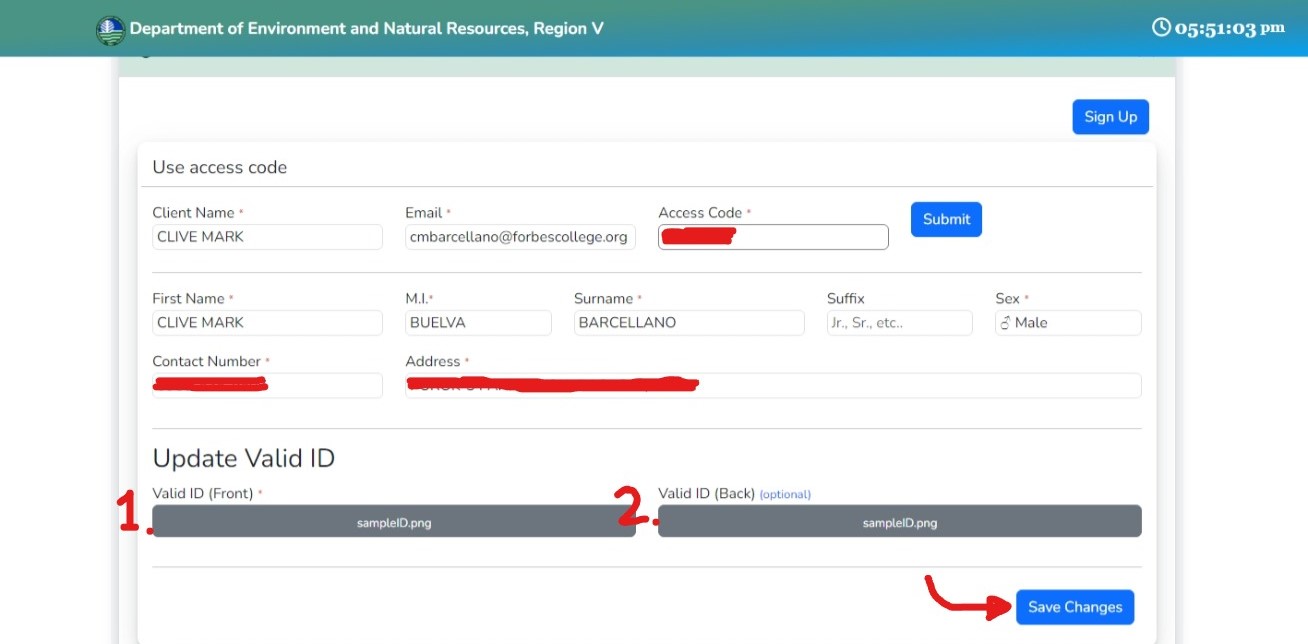
Verify client information
To verify client information, click the "Use code" button.
once the use access code form appear, input the following information needed:
- Client name
- Access code
then click "Submit"

If client information is verified the system will display the verified client data where they can update it
Step 7:
Upload client id
Update all necessary information once validated and upload valid ID.
- Philippine Passport
- Driver's License issued by the Land Transportation Office (LTO)
- Unified Multi-Purpose ID (UMID) issued by the Social Security System (SSS)
- Professional Regulation Commission (PRC) ID
- Voter's ID issued by the Commission on Elections (COMELEC)
- Postal ID issued by the Philippine Postal Corporation (PHLPost)
- National Bureau of Investigation (NBI) Clearance
- Police Clearance
- Government Service Insurance System (GSIS) ID
- Senior Citizen ID
- Overseas Workers Welfare Administration (OWWA) ID
- OFW ID Card
- PhilHealth ID
- Department of Social Welfare and Development (DSWD) ID
- Barangay Certification with a photo and signature
then click "Save Changes"
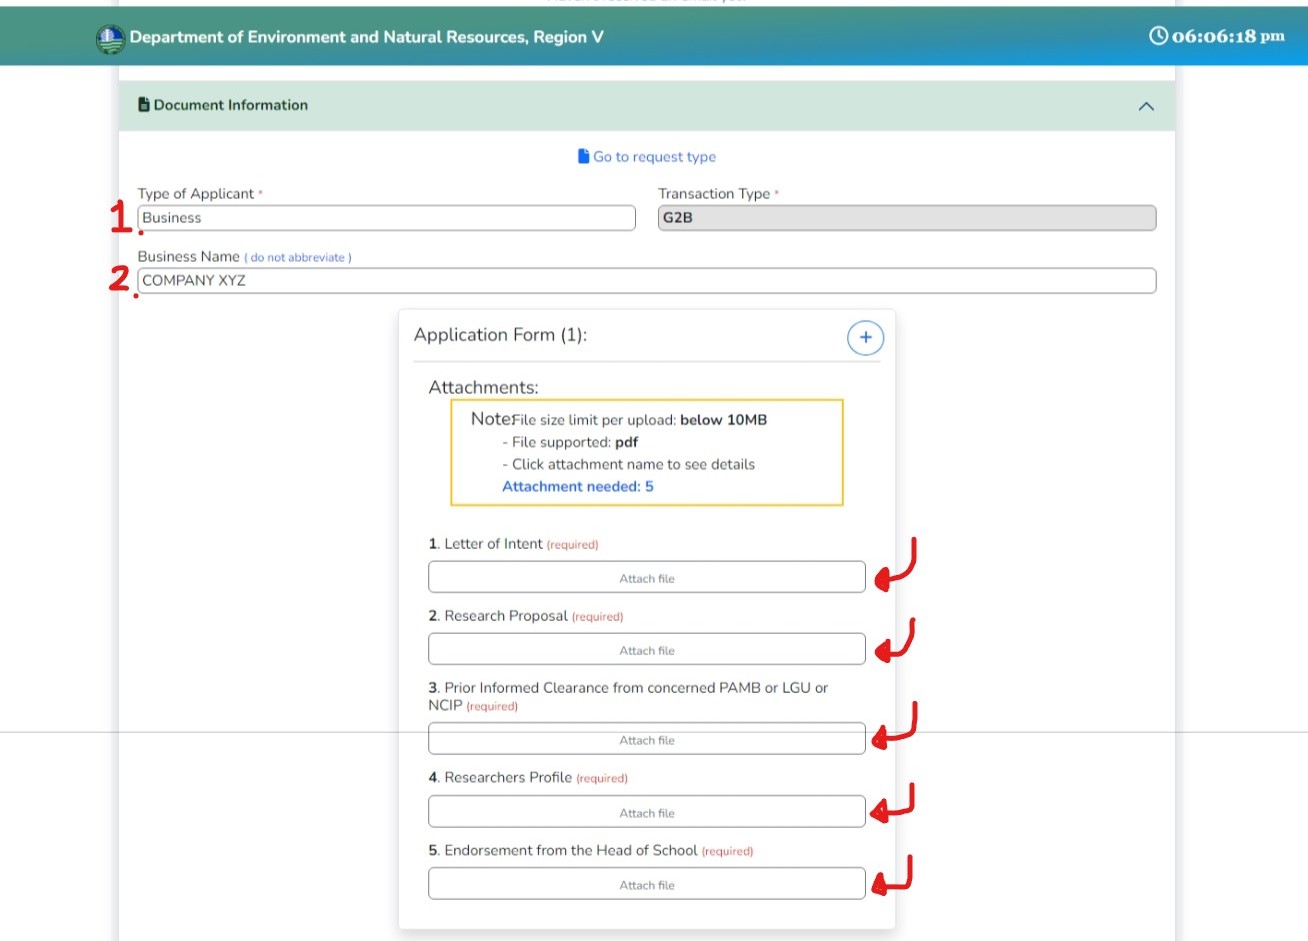
Step 8:
Input document information
Choose the applicant type:
- Government Agency
- Business
- Citizen
if you input government agency or business as application type you have to enter the business name
after that input all documents and information required for your request
Step 9:
Choose what office to send the request

Step 10:
Agree to certification and data privacy concent

Step 11:
Once everything is done click the "Submit request" button
